
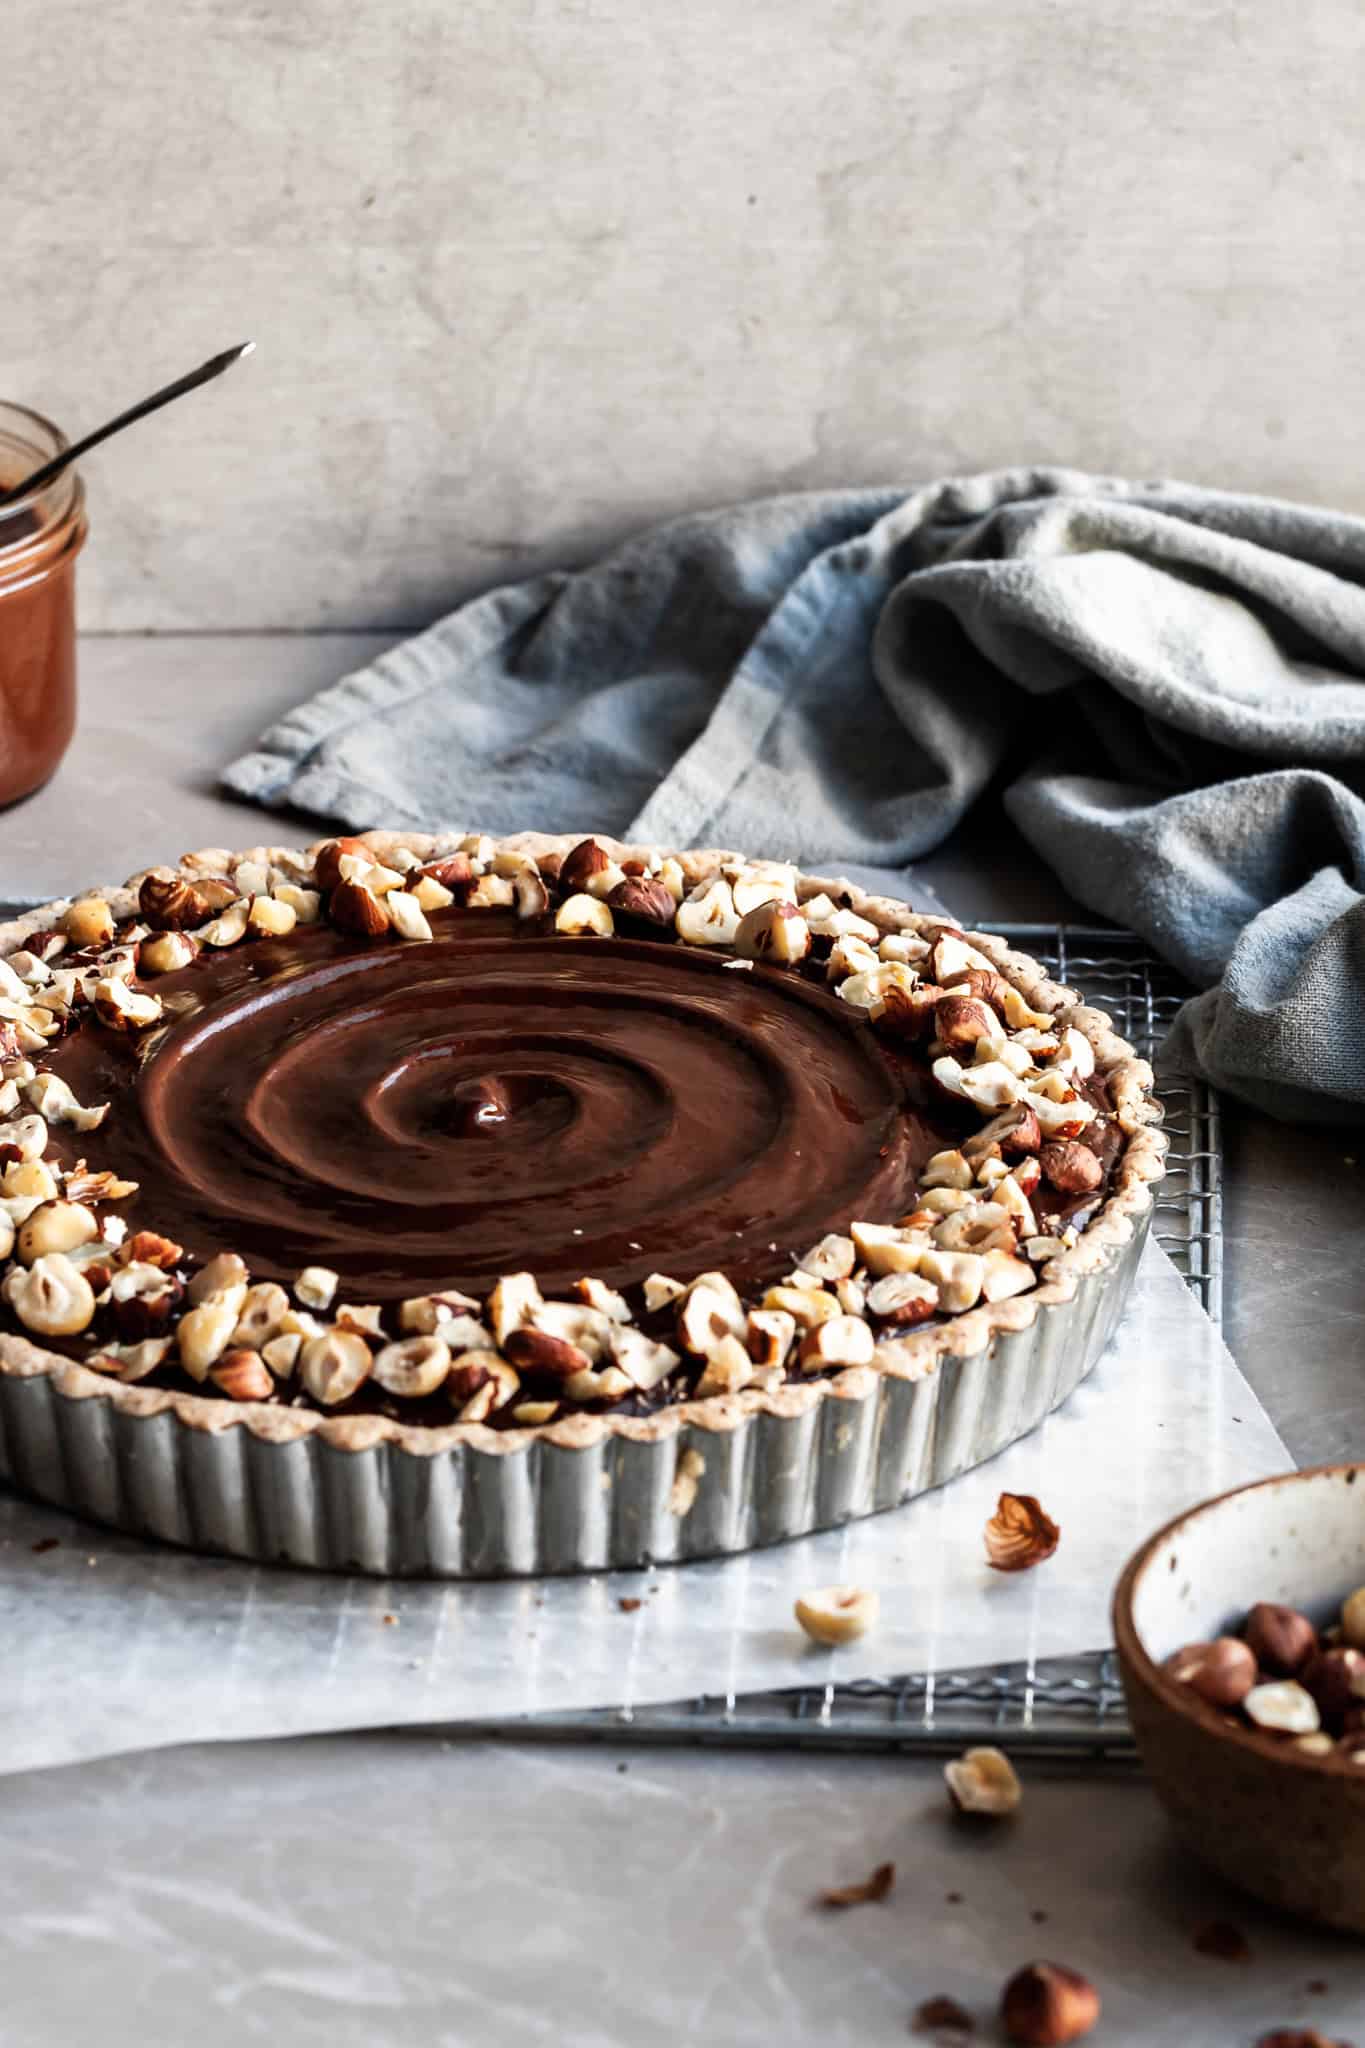
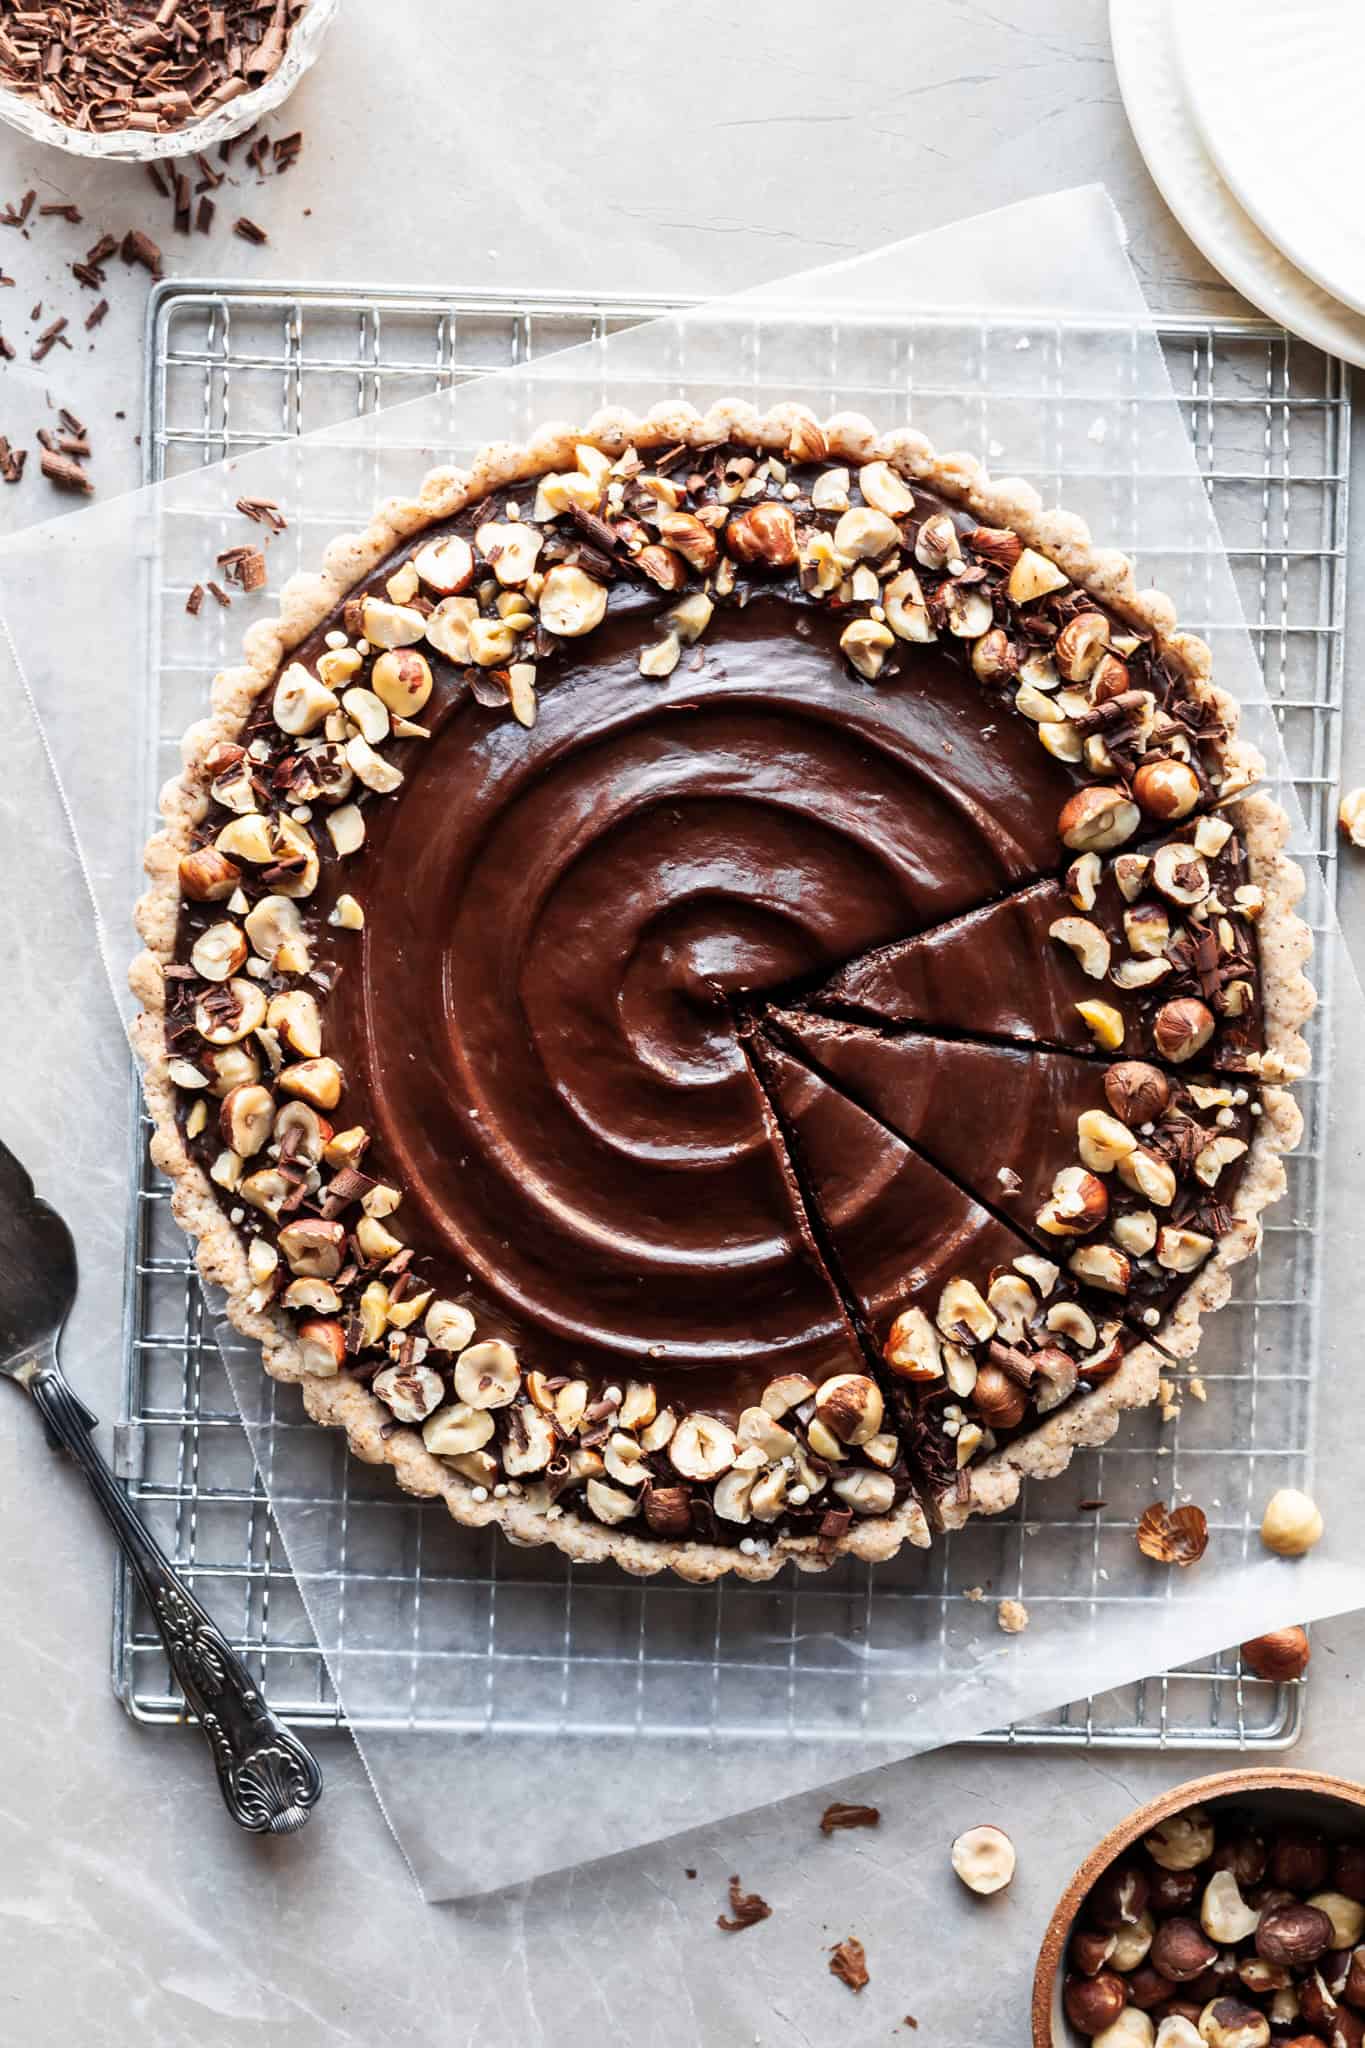
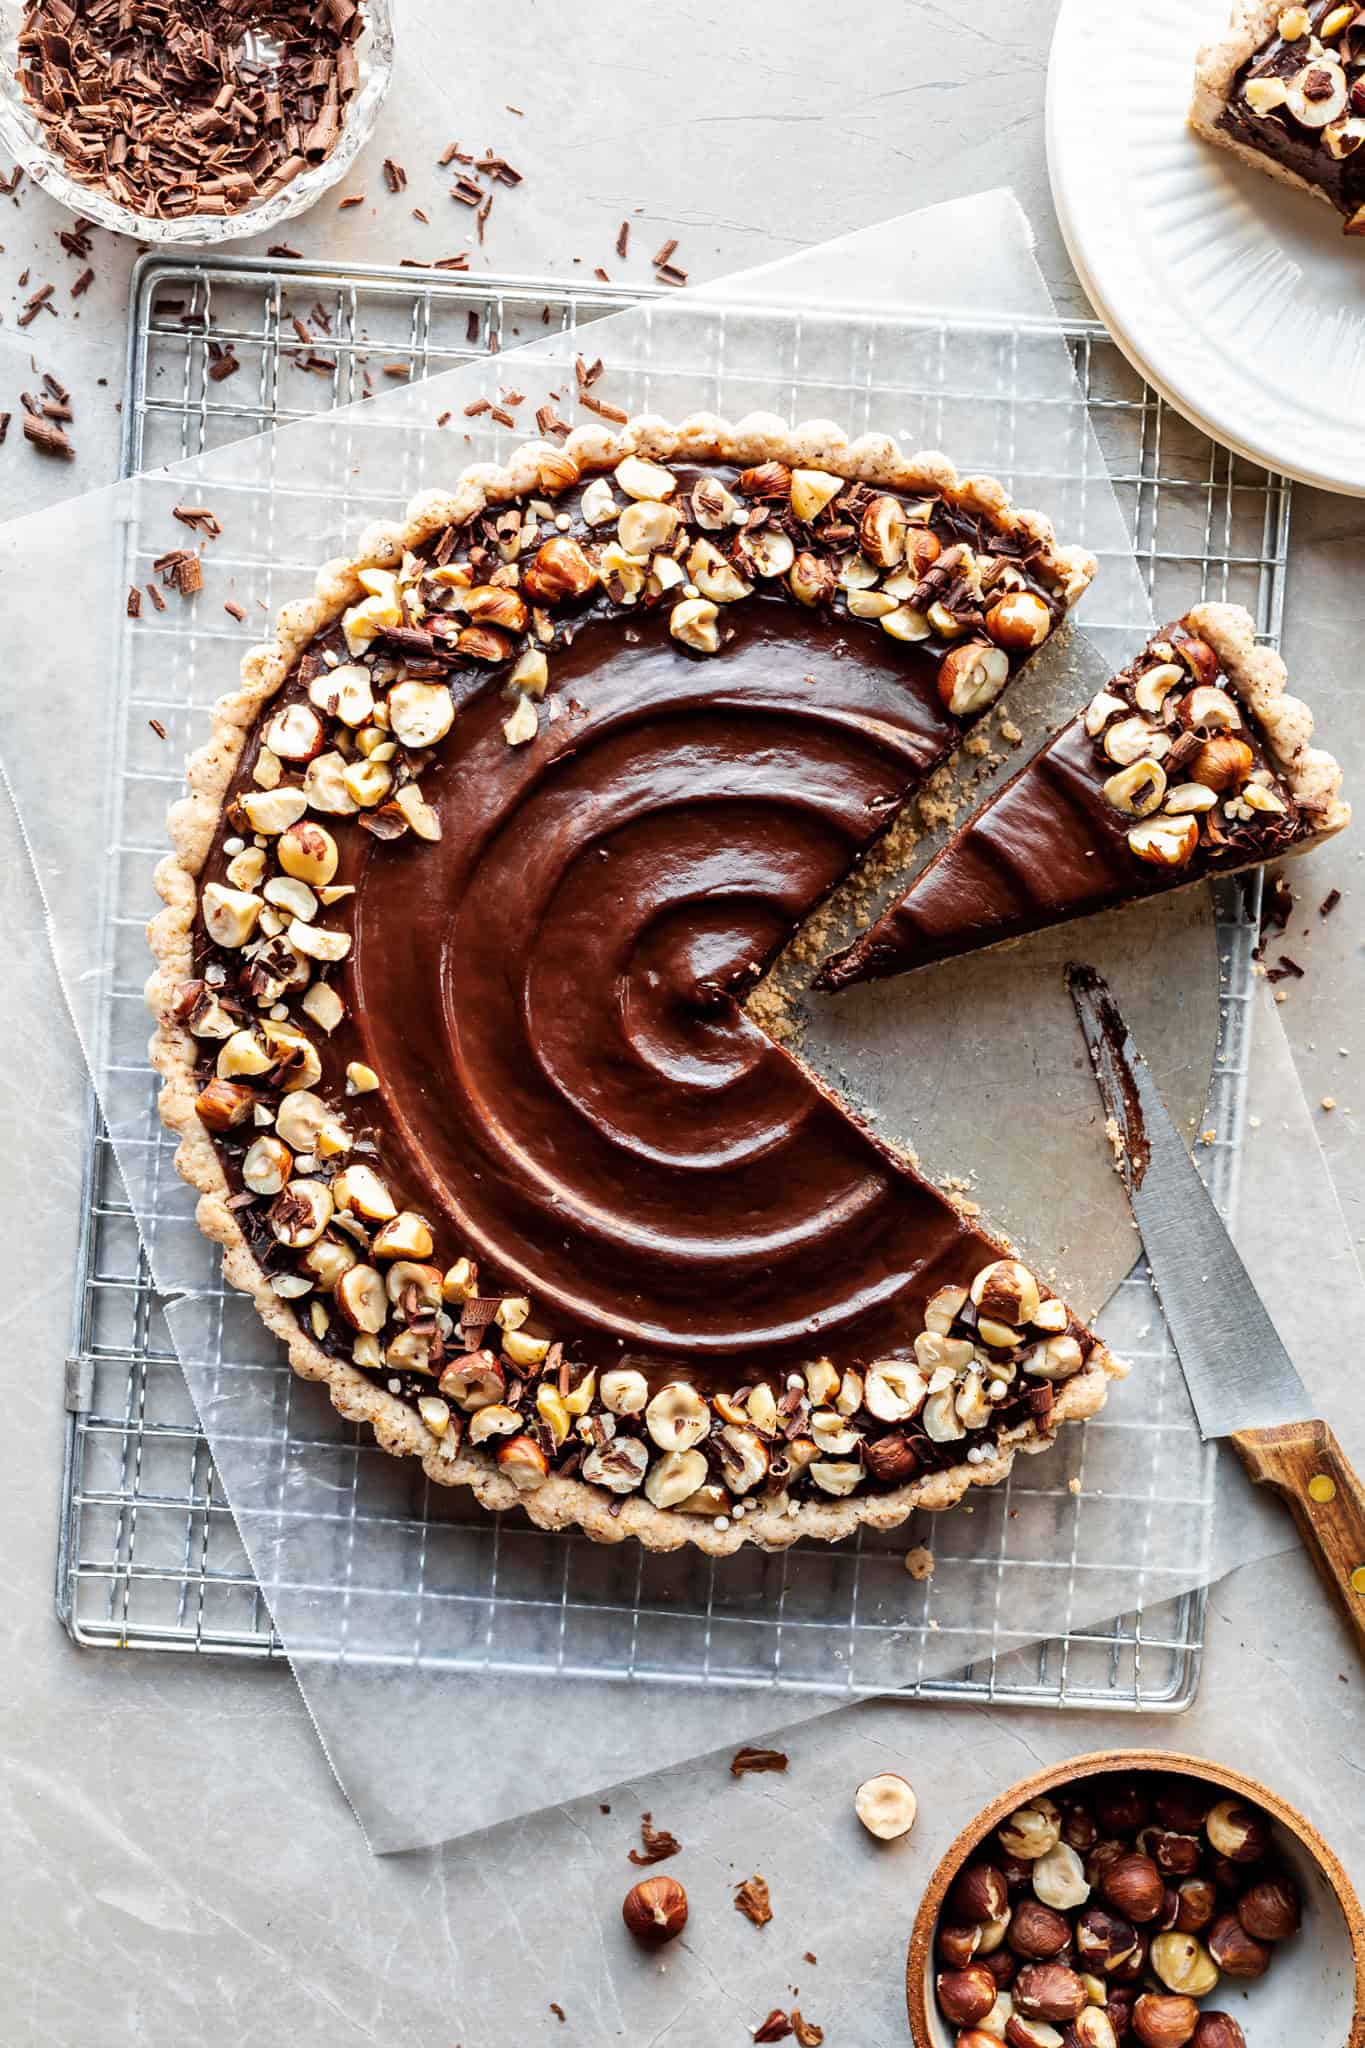
This Chocolate Hazelnut Tart is a decadent showstopper but is so easy to make. A silky smooth chocolate hazelnut layer is nestled in a melt-in-your-mouth toasted hazelnut shortbread crust and then finished with a generous layer of dark chocolate ganache. It's made without a lick of cream, butter or eggs! Goes to show that a chocolate tart this creamy and rich can certainly be unassumingly dairy-free and egg-free!
I think we can all agree that chocolate and hazelnut are two flavors that are definitely meant for each other. Nutella has proven this one as you can find their chocolate hazelnut spread in just about every corner of the planet. The thing about Nutella though, is that it contains dairy which is a disappointment if you're vegan. But the good news is that you can make your very own chocolate hazelnut spread so easily at home!
Check out my recipe for easy vegan Chocolate Hazelnut spread which, I dare say, is more flavorful than the big brand version because there's no fillers to dilute those delicious hazelnut and chocolate flavors!
You need one cup of chocolate hazelnut spread for this vegan tart recipe, and my recipe for the homemade chocolate hazelnut spread yields a little more than one cup. So one cup for this recipe and a some for eating off a spoon as a reward for your awesomeness while you wait for the tart to chill!
If you plan on making this with store-bought chocolate hazelnut spread, make sure you use one you really love. I've tried a few different brands that are dairy-free and I've found there's quite a range in how they taste.

How to Make a Chocolate Hazelnut Tart:
There's 3 small parts to this vegan tart recipe:
- Hazelnut shortbread crust: In a food processor, the press-in shortbread crust and bake for about 15 minutes
- Chocolate Hazelnut Filling: Whisk together the chocolate hazelnut tart filling on the stove, pour into the crust, then chill for 2-3 hours
- Chocolate Ganache Topping: Make the easy chocolate ganache in the microwave and smooth over the tart.
Not complicated, right? The hardest part about this vegan tart is waiting for it to cool to cut into!
We use toasted hazelnuts in this recipe because they have a nicer flavor than just plain hazelnuts. We will be pulsing ⅔ cup of them into hazelnut meal for the shortbread crust and then sprinkling ⅓ cup of them on top at the end. If you're going to be making your own chocolate hazelnut spread as well for the filling, my recipe calls for one cup of hazelnuts so in total you'll need 2 cups of hazelnuts for this chocolate hazelnut tart. Keep this in mind when roasting your hazelnuts so you can do them all at once if your baking sheet is big enough.
How to Make a Hazelnut Shortbread Crust:
This is the easiest kind of pastry recipe because you don't have to gentle with it, or roll, measure, trim or blind bake it. Just press firmly and evenly into the tart pan, poke a bunch of times with a fork and bake!
Each ingredient has a role:
- Roasted hazelnuts - this is where the toasty flavor is coming from as well as some fat for binding and texture. As mentioned above, you can use hazelnut meal.
- Flour - helps with binding and creates structure. You can use gluten-free all-purpose flour if desired.
- Confectioner's sugar - I prefer using this in shortbread because it's powdered so it adds a little sweetness without adding any grittiness like granulated sugar can. We want luscious, crisp, smooth shortbread.
- Refined Coconut Oil - this helps with binding the shortbread and gives that melt-in-your-mouth feel. I use refined which is flavorless and allows the hazelnut flavor to shine.
How to Make Chocolate Hazelnut Pie Filling:
The second part of this vegan tart recipe is done on the stove so once your crust is baked, you can turn the oven off!
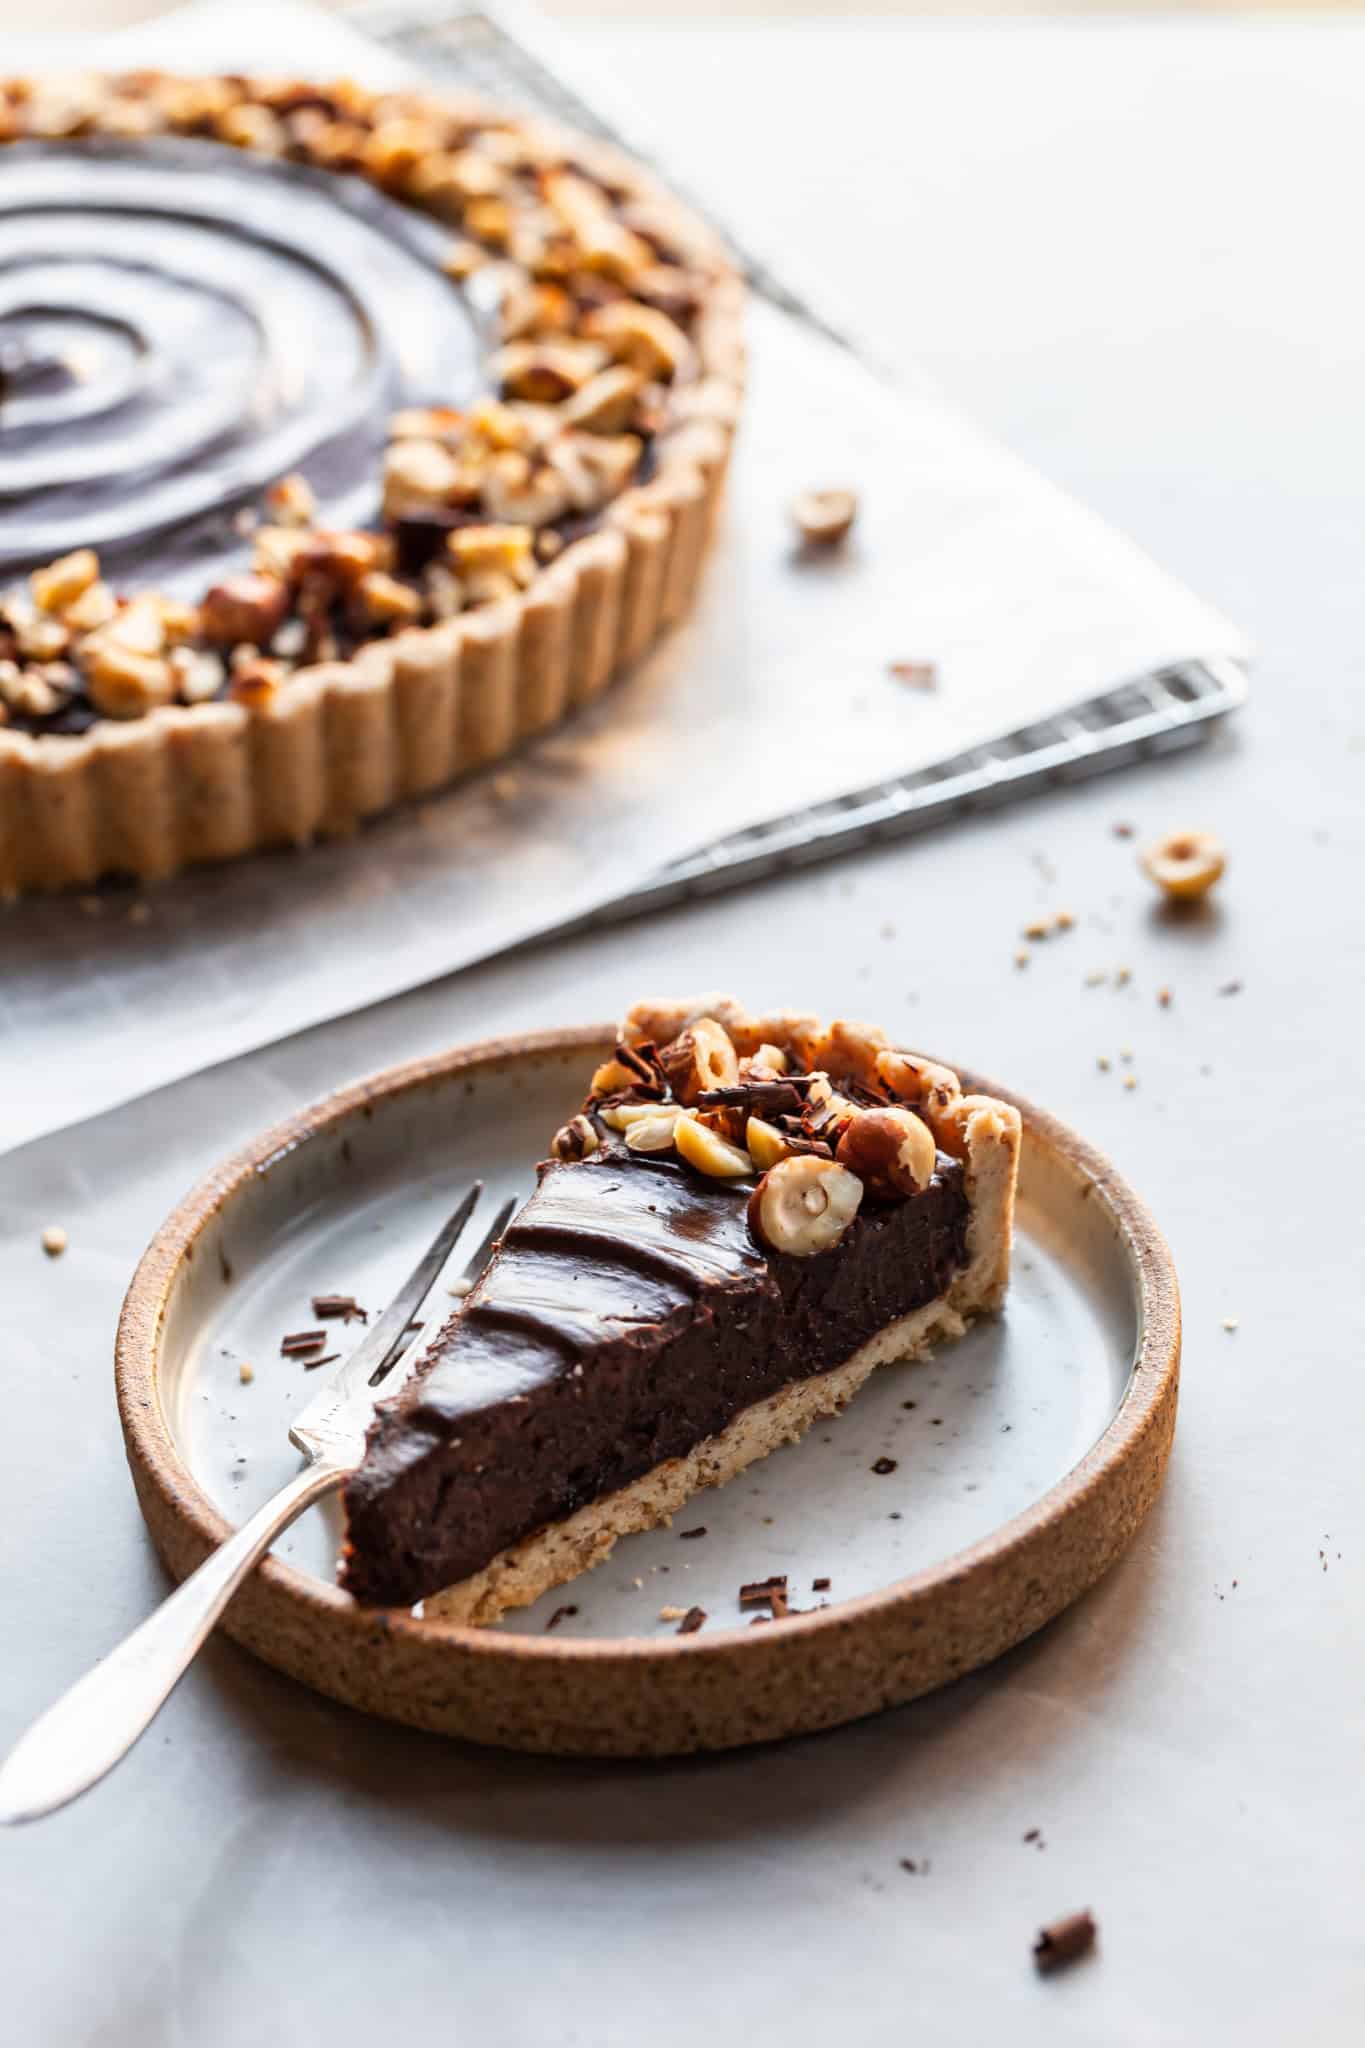
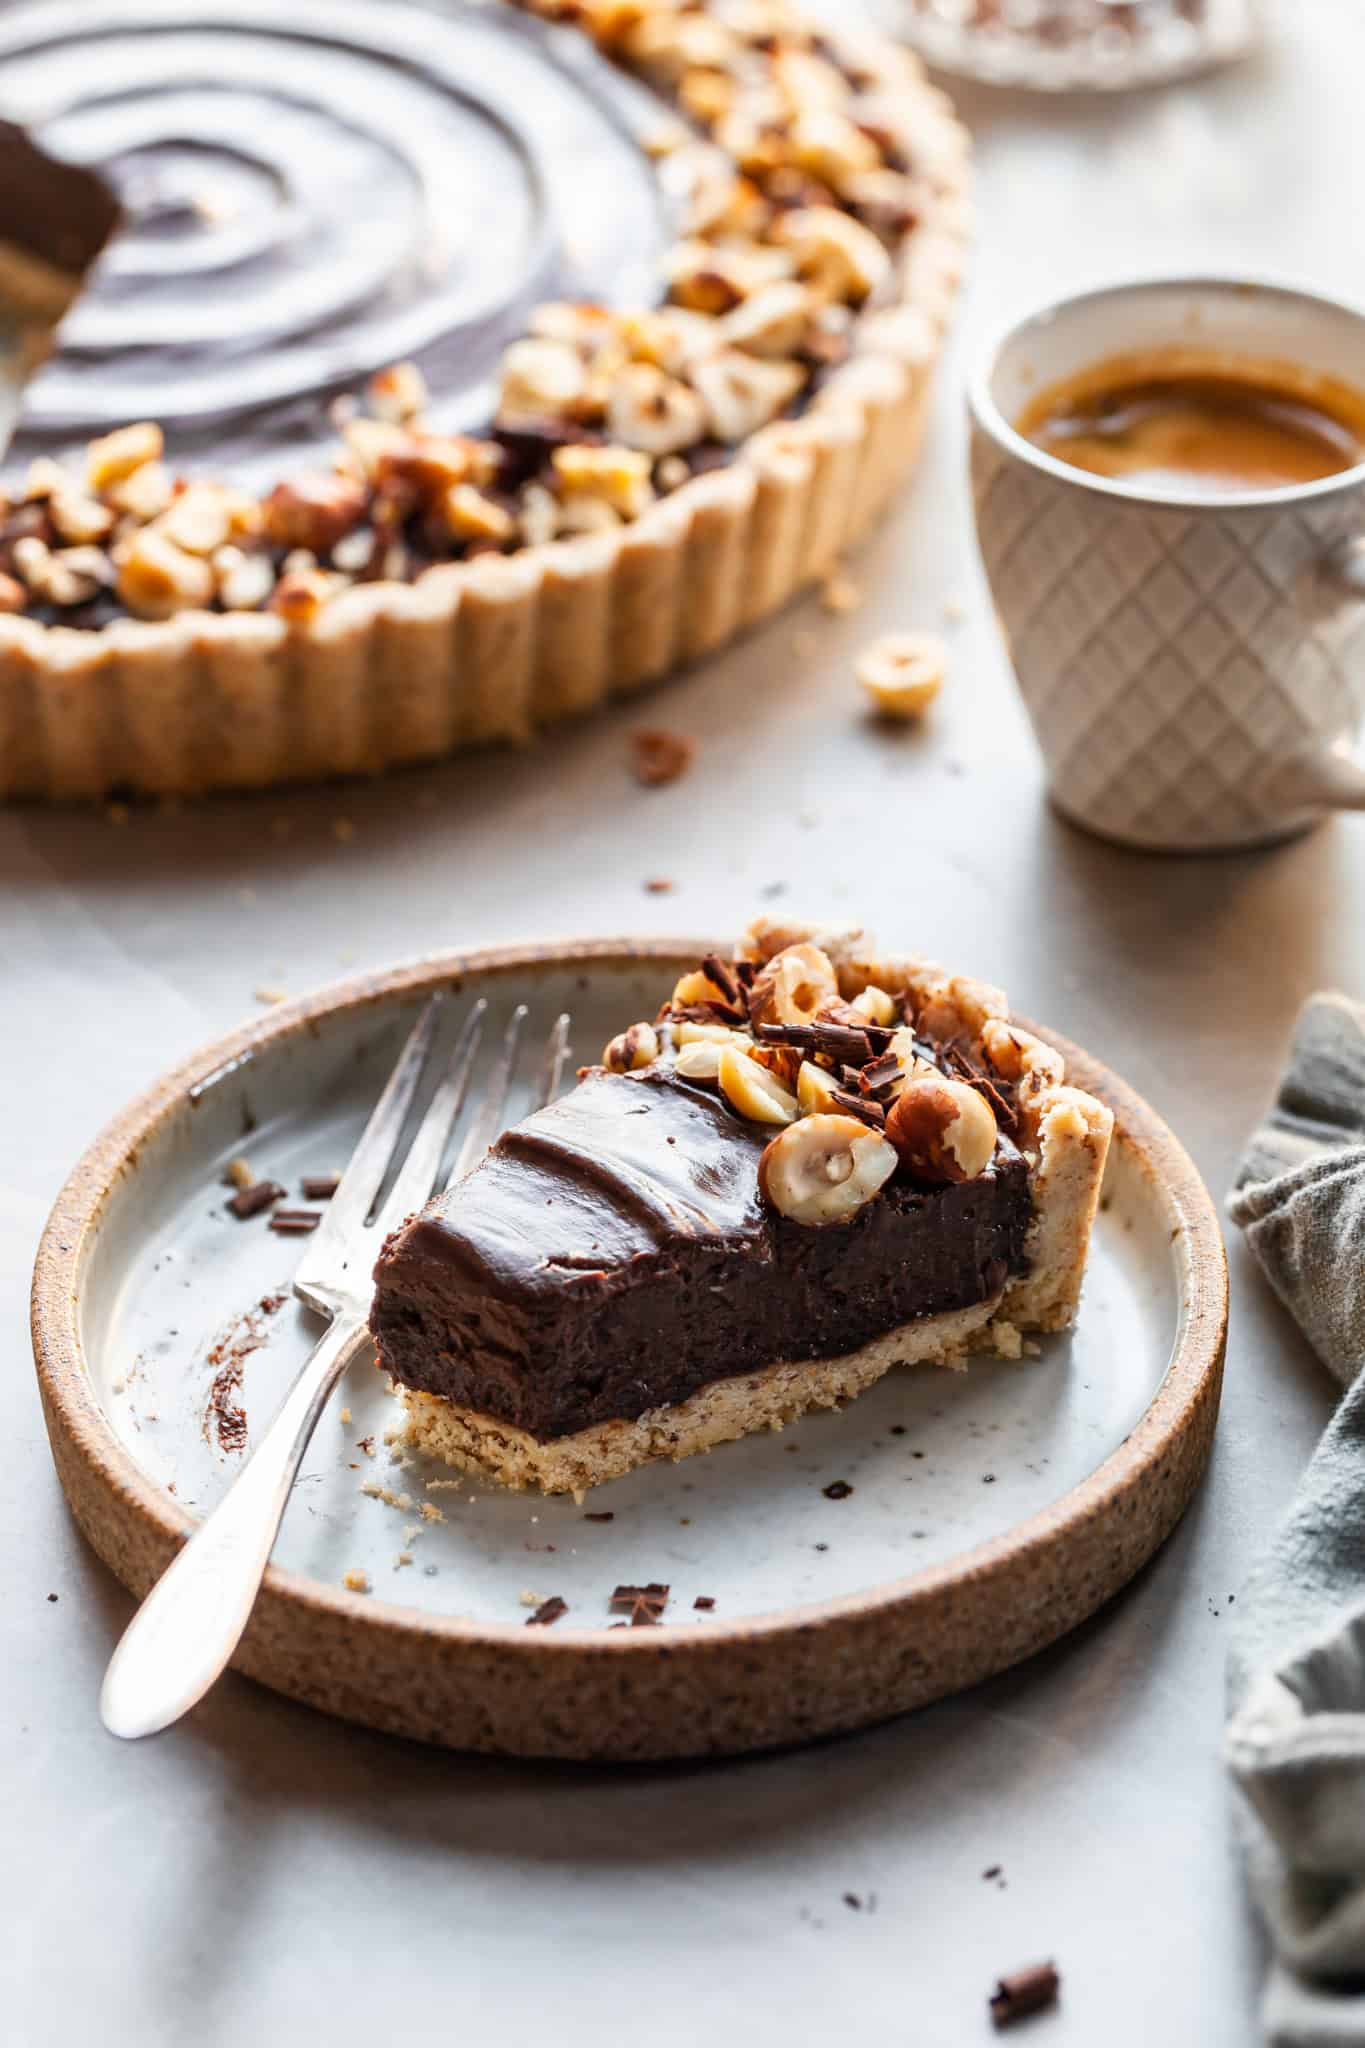
The chocolate tart filling is essentially a really rich, thick pudding. The plant-based milk is flavored with chocolate hazelnut spread, cocoa powder, a bit of sugar and vanilla, and thickened with cornstarch (some call it corn flour). As soon as it's done, pour it into the shortbread crust and smooth it before it sets. Place a piece of cling wrap (or parchment if you're reducing plastic use) directly on the surface while it chills so a skin does not form.
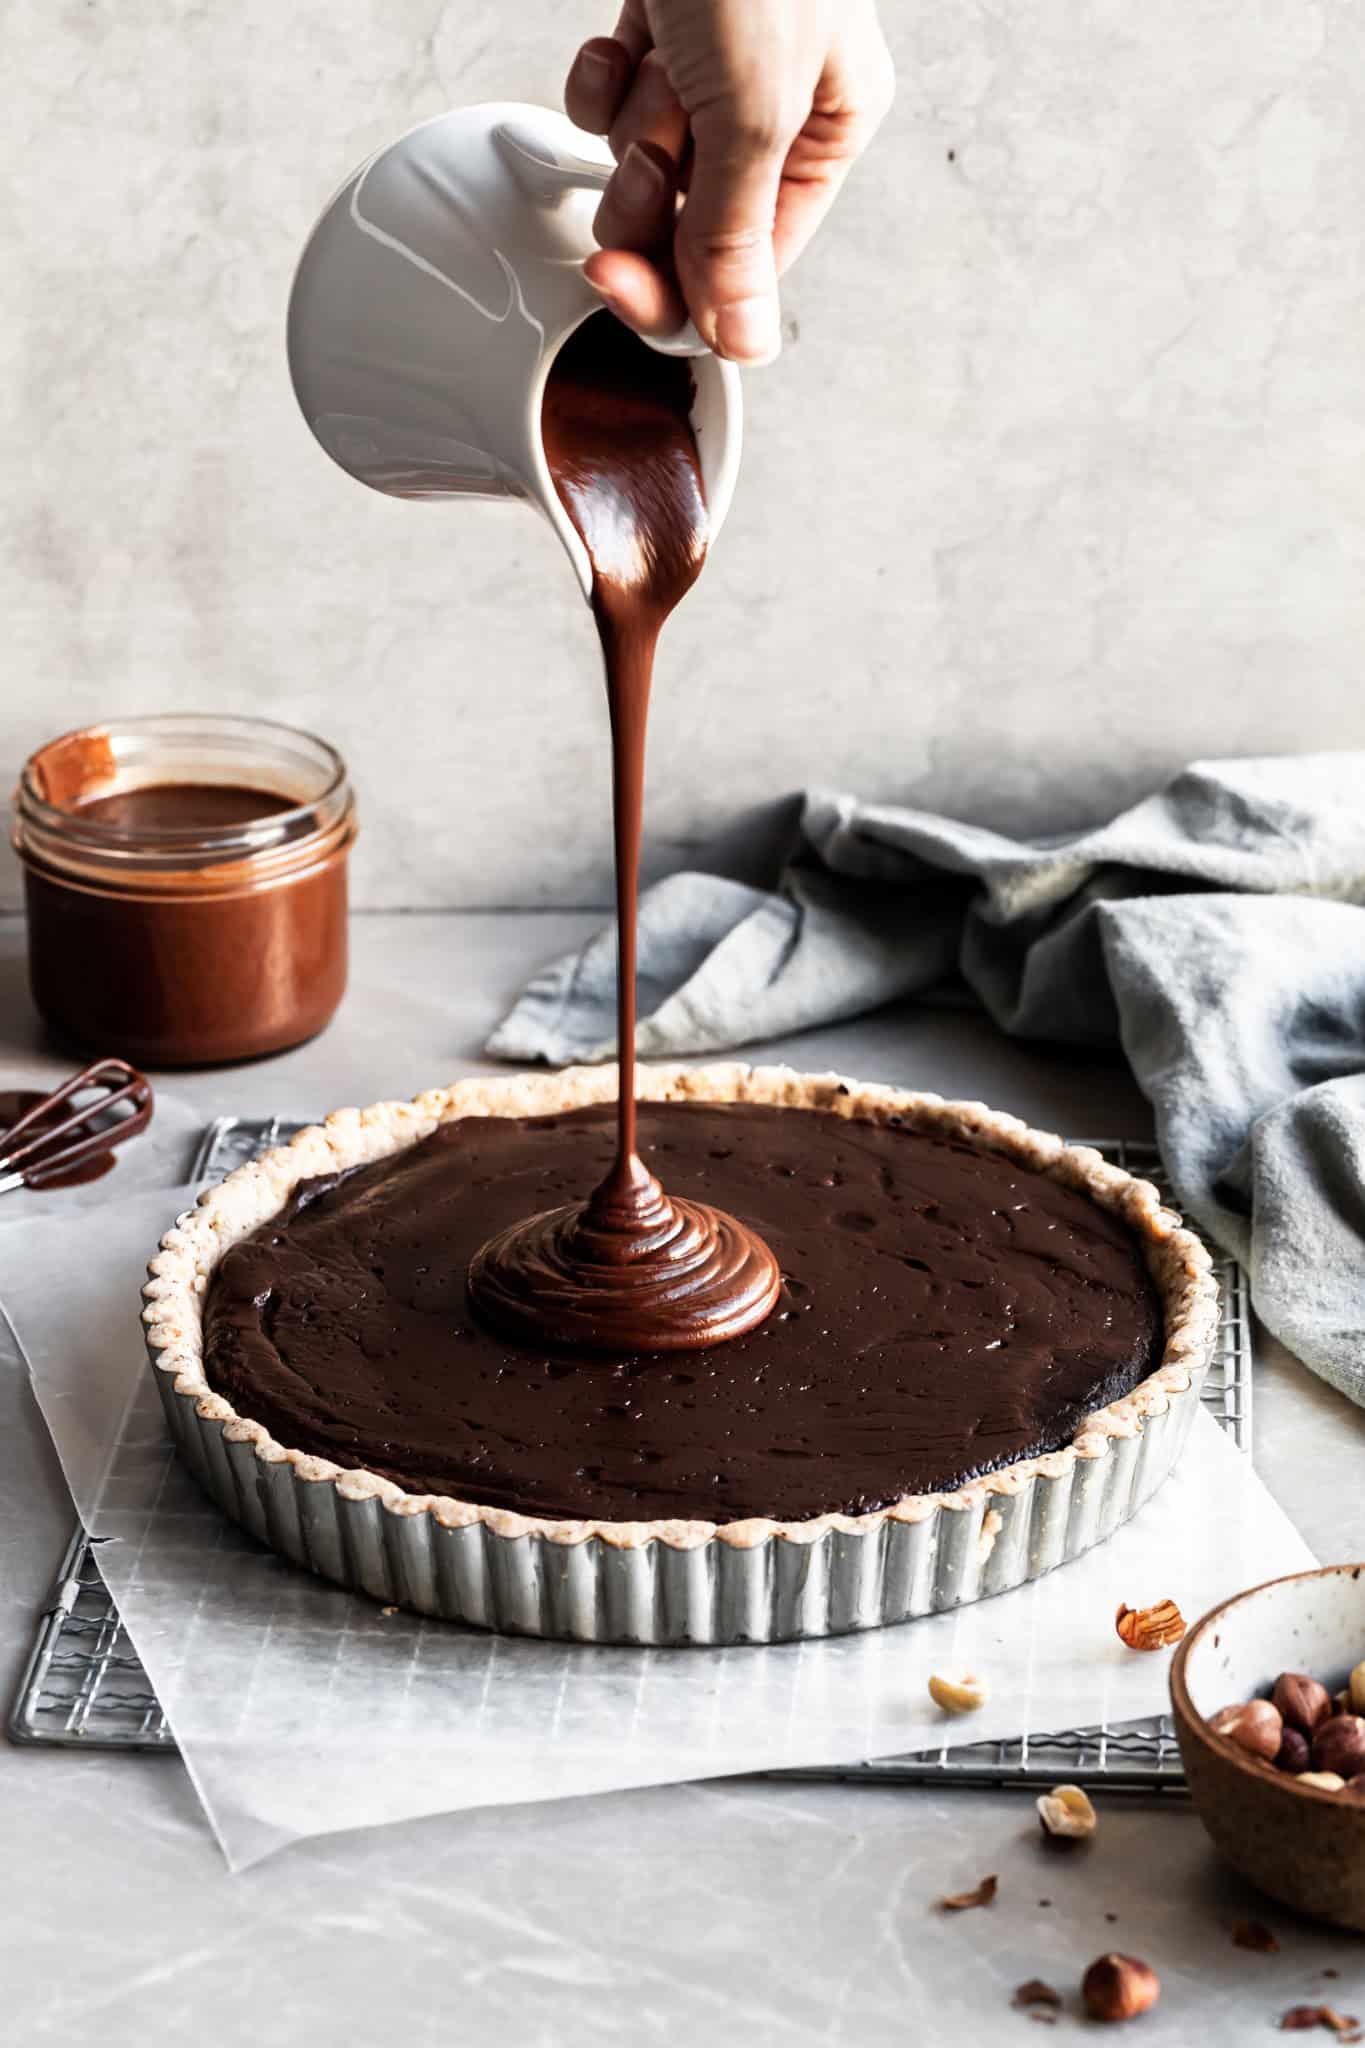
How to Make Dairy-Free Chocolate Ganache:
Ganache, while sounding a bit fancy, is one of the easiest things to make! Traditionally, equal amounts of cream and chocolate are melted together. For this vegan version, we melt chocolate in coconut cream, and then stir it until silky smooth. If you do it in a microwave, just do so in bursts of 20-30 seconds so you don't seize or burn the chocolate. Seized chocolate renders it unusable in ganache - it becomes hard and won't blend.
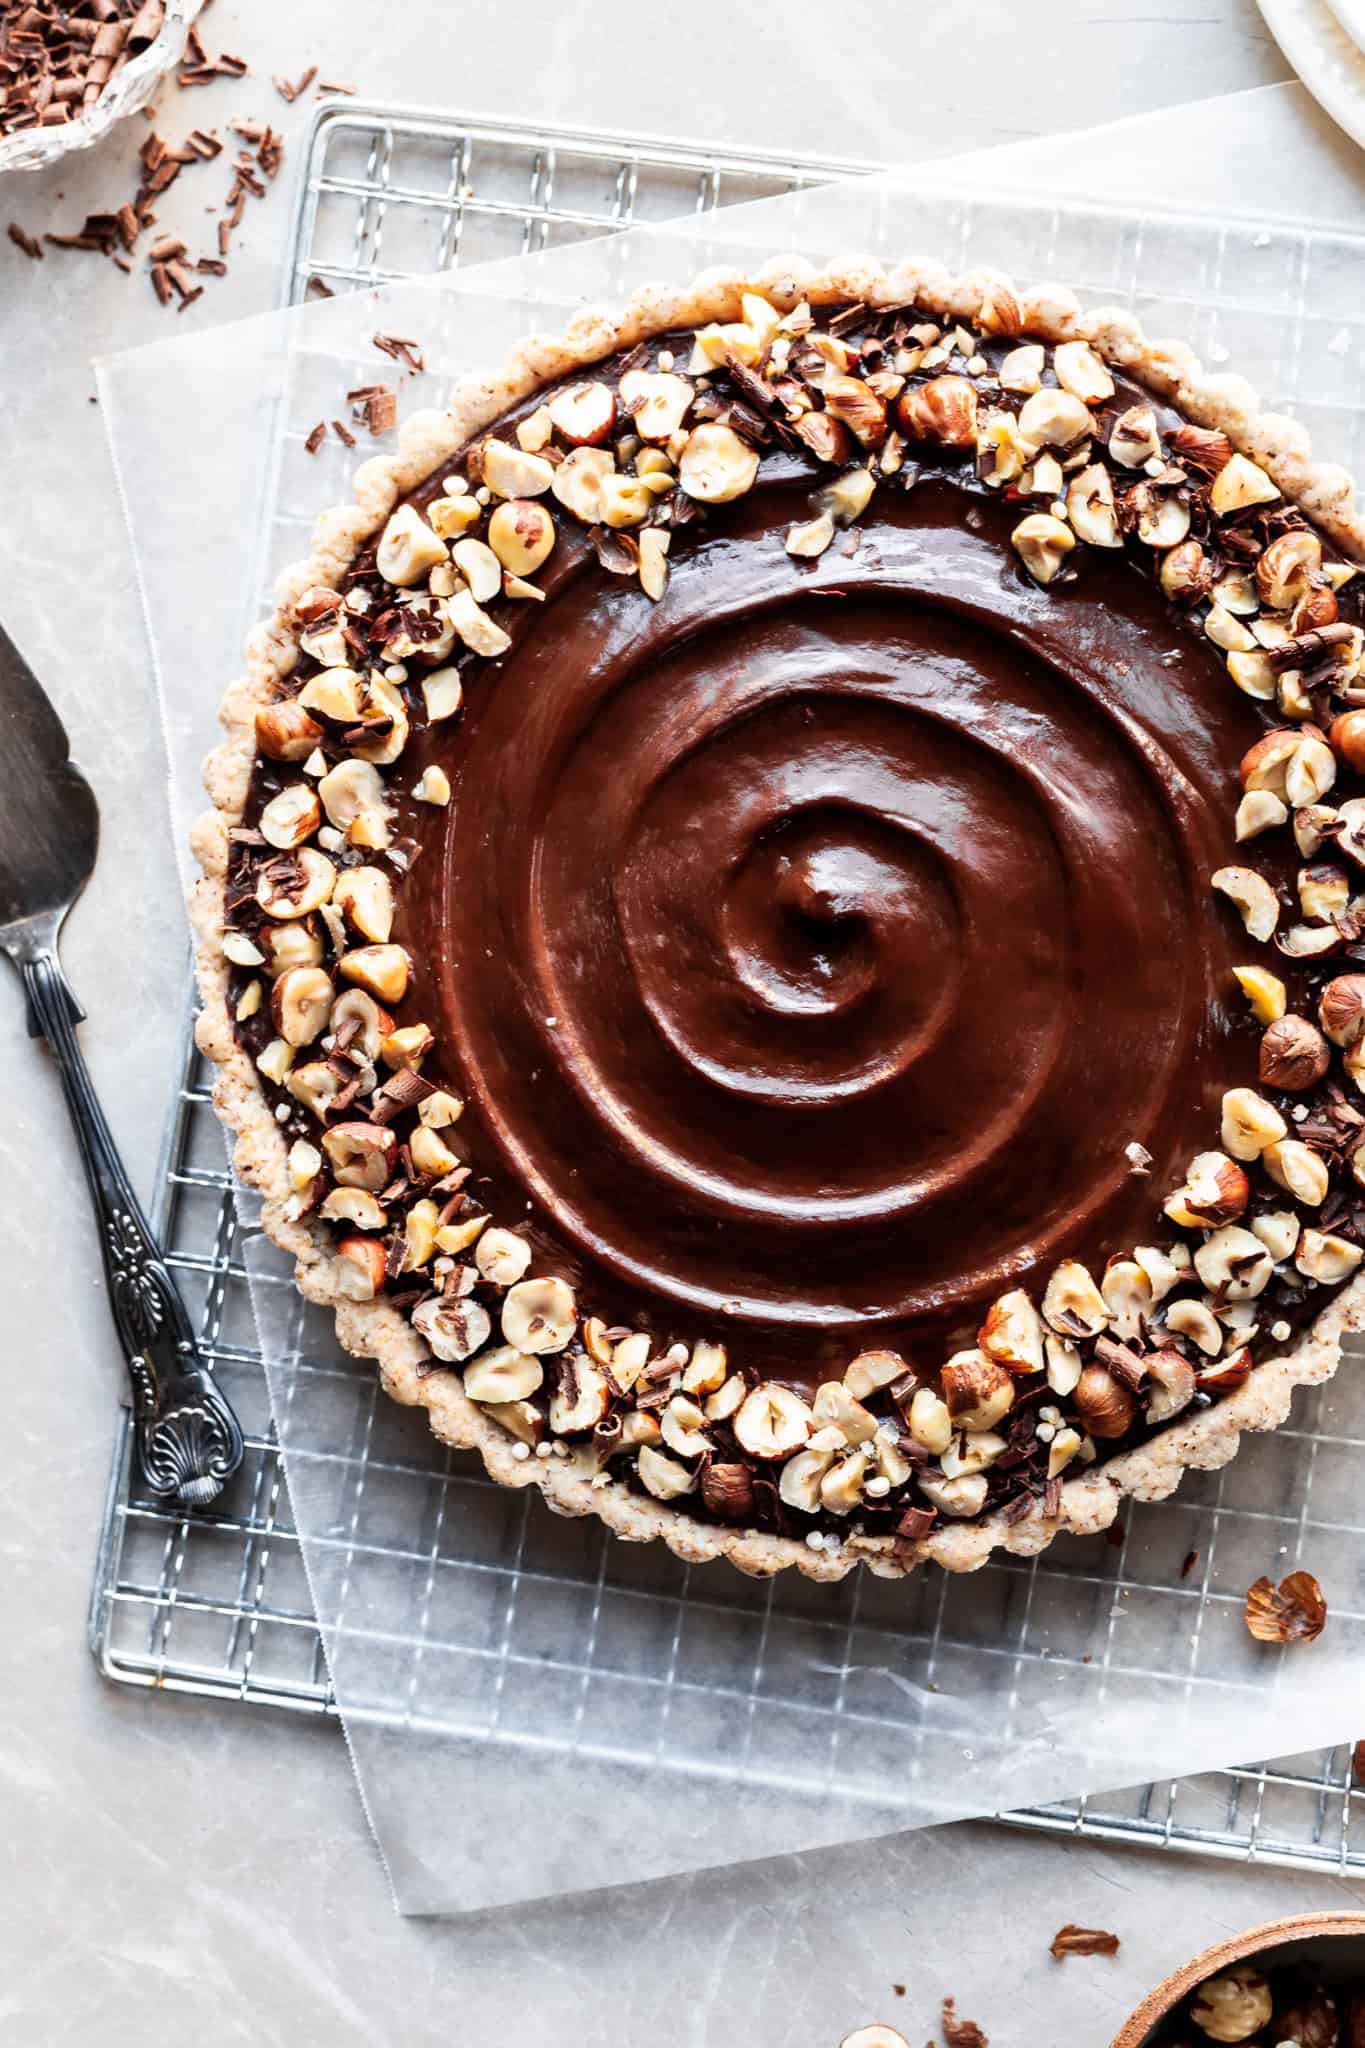
Once your tart is cooled, pour that luscious chocolate ganache over the top and sprinkle with extra toasted hazelnuts. The tart can be served straight away, or chill it completely in the fridge.
This vegan dessert is perfect for making ahead of time. It can be made up to 3 days ahead, kept covered tightly in the fridge.
How to Roast Hazelnuts:
If your hazelnuts are raw, you can roast them yourself. I've included the instructions below and in my vegan chocolate hazelnut spread recipe:
- Preheat the oven to 325°F.
- Spread the hazelnuts on a cookie sheet and roast for 10-15 minutes. Shake the tray every 5 minutes for even roasting.
- Once the hazelnuts start to smell toasty and they become slightly darker, remove them from the oven. You'll want to watch them carefully because they burn very quickly. Let cool until you can handle them.
- Remove as many skins as you can. The skins aren't a deal breaker, but they are a little bit bitter. I prefer to do this by rubbing them between my hands over the cookie sheet, or you can place them on half of a clean tea towel, then fold the other side over and rub back and forth to remove the skins. Some skins will be stubborn and won't let go, but don't stress about them.

How to Toast Hazelnut Meal:
If you have hazelnut meal you'd like to use up, you can use it instead of whole hazelnuts blended up to make the shortbread crust. Keep in mind that ⅔ cup of hazelnuts called for in the shortbread crust does not equal ⅔ cup hazelnut meal but both equal 90 grams so best to use the weighted unit for accuracy.
- Heat a dry heavy bottom skillet over low-medium heat.
- Add the hazelnut meal and stir constantly until it smells toasty and just starts deepening in color. As soon as this happens, remove the hazelnut meal from the pan and allow to cool on a plate or bowl. It will continue to cook in the hot skillet and can burn quickly, especially if you're using cast iron.
If you make this Chocolate Hazelnut Vegan Tart, please give it a rating in the recipe card and leave a comment below! Follow along on Instagram where you can tag me in your creations using my recipes, I love seeing what you're cooking! You can also follow me on Pinterest for vegan recipe inspiration and on Facebook. Thank you for reading!

Chocolate Hazelnut Tart - Vegan with GF Option
Ingredients
Toasted Hazelnut Shortbread Crust
- ⅔ cup toasted* hazelnuts
- 1 cup all-purpose flour may sub with gluten-free all-purpose blend
- 4 tablespoon confectioner's sugar
- ¼ teaspoon salt
- ⅓ cup refined coconut oil
Chocolate Hazelnut Pudding
- 2 cups unsweetened plant-based milk, divided
- 4 tablespoon cornstarch
- 1 cup vegan chocolate hazelnut spread** (use one you really love)
- ⅓ cup granulated sugar
- ⅓ cup unsweetened cocoa powder
- 1 teaspoon vanilla extract
- ⅛ teaspoon salt
Chocolate Ganache and Garnish
- ½ cup vegan semi-sweet chopped chocolate or chocolate chips
- ½ cup canned coconut cream***
- ⅓ cup toasted hazelnuts, chopped
Instructions
For the Crust:
- Preheat the oven to 350°F. In a food processor, blend the hazelnuts until a coarse meal forms, scraping down the sides and bottom. Don't over process or it'll become greasy and then into nut butter.
- Add the flour, confectioner's sugar, and salt. Pulse several times to blend. Add in the refined coconut oil and process on low for about 30 seconds until a loose dough forms. It should stick together when you press it between your fingers.
- Press into a 9-inch fluted tart tin with removable bottom. Start with the sides and work your way down ensuring that the crust is even. Use a measuring cup to press and smooth out the surface. Gently pierce the sides and bottom every inch or so with a fork and bake for 12-18 minutes or until fragrant and starting to lightly brown. Let the crust cool completely on a cooling rack.
For the Filling:
- While the crust is cooling, in a small bowl, whisk the cornstarch with ⅓ cup of the plant milk until no lumps remain. Set aside.
- In a medium-sized saucepan over medium heat, whisk together the remaining 1 ⅔ cups milk, chocolate hazelnut spread, sugar, cocoa and salt. Once it starts to simmer, slowly drizzle in the cornstarch slurry, whisking constantly to avoid developing lumps. Continue to simmer and cook for about 2 minutes and the pudding has started to thicken (it will thicken further once chilled.) Whisk in the vanilla.
- Pour into the cooled crust and smooth out evenly. Place a piece of plastic wrap directly over the top so a skin doesn't form. Chill for about 3 hours or until cold and set.
For the Ganache:
- In a microwave-safe bowl, combine the chocolate and coconut cream. Start with a 30 second burst, stir, then microwave for 10-20 second increments, just until melted. Don't overheat or the chocolate will burn and seize becoming hard and unusable for ganache. Whisk until smooth and pour over the chilled tart. Spread evenly over the top. Garnish with the chopped hazelnuts. Best if chilled until the ganache is set for easy slicing, but may served right away. Store leftovers in an airtight container in the refrigerator for 5 days.
Nutrition Info:
Notes:
The Nutrition Information is only an estimate. The accuracy of the Nutrition Information for any recipe on this site cannot be guaranteed.
Post may contain affiliate links which means if you click on the link and make a purchase, I'll get a very small percentage in commission. There's never any extra cost to you, and I only link to products I actually use and enjoy. Thank you for your support!
This recipe was first published on Crumbs & Caramel June 06, 2018. The recipe has since been improved since then with a thicker ganache topping. The post has been updated with improved educational value and fresh images.

Cindy says
Seriously one of the best desserts I’ve made. My vegan and not vegan friends ask me to make it for any event!