
Moist chocolate cake baked over sweet strawberries bathed in chocolate sauce. A quick and easy vegan dessert made all in one pan: the cake rises to the top while the strawberries mingle in a chocolate sauce on the bottom. This simple yet decadent self-saucing chocolate strawberry pudding cake is as perfect for last-minute dessert on busy weeknights as it is for wooing guests. This recipe is egg-free, dairy-free and can be made gluten-free.
Thank you to Stahlbush Island Farms for sponsoring this post. All opinions are my own.

What is Self-Saucing Pudding?
Self-saucing chocolate pudding (aka self-saucing chocolate cake or puddle cake), is an old-fashioned British dessert. Sugar and cocoa powder are sprinkled over cake batter, and then boiling water is poured over the top before baking . If you've never made this type of classic dessert, the process and the end result may take you by surprise. It's pretty magical - as it bakes up, the cake rises to the top and the sauce creates itself at the bottom. If you're a fan of lava cake or mud cake, you're going to love this rich vegan chocolate dessert!
One of the things I love about vintage desserts is how simple many of them are. This is one of the easiest desserts ever but never fails to impress. No special equipment or fancy ingredients are needed, and it comes together quickly. There are many different flavor possibilities for self-saucing pudding, too. Have you tried my Self-Saucing Cherry Chocolate Fudge Cake? I have a few more coming your way...if you love butterscotch, you'll want to say tuned!

As the cake bakes, the sugar and cocoa powder trickle down to mingle with the strawberries as they release some of their juices. The result is a delicate chocolate sponge resting on top of strawberries swimming in a luscious chocolate sauce. I used Stahlbush Island Farms' frozen strawberries which are vine ripened and perfect for year round berry goodness!
How to Make Self-Saucing Chocolate Strawberry Pudding


What Type of Pan to Bake Self-Saucing Pudding In
There are no rules about which kind of pan to use for self-saucing pudding. Any type of baking dish which can hold a volume of 8 cups (2 L) will work! I frequently use a 10" (25 cm) cast iron skillet or a 9" (23 cm) round cake pan. As we're baking with strawberries with acidic juices, make sure your cast-iron skillet is either enameled or well seasoned so you don't end up with a metallic taste in the sauce.
If you're not sure of the volume of your baking dish, check it by pouring one cup (250 mL) at a time into the baking dish to see what it will hold. If the dish holds more than 8 cups, the self-saucing cake will naturally be thinner and harder to cover the strawberries. The baking time may need to be reduced a little as well.
Whichever baking dish you choose to use, it's worth placing a sheet of tin foil underneath it. The foil will catch any sauce that bubbles over so it doesn't burn on the bottom of the oven.
Feature Ingredients and Substitutions
All-purpose flour: a 1:1 gluten-free flour blend which contains xanthan gum can be used in lieu of wheat flour. Avoid blends which contain garbanzo (chickpea) flour which lend themselves better for savory recipes.
Granulated sugar: this is a decadent dessert which boats a fluffy sponge cake and a rich, satiny chocolate sauce. Both of these components rely on sugar for both their structure and flavor. I don't recommend reducing the sugar for those reasons.
Dutch-process cocoa powder: Compared with regular cocoa powder, Dutch process cocoa powder dissolves better in liquid (like the chocolate sauce for this dessert.) It also has a deeper, more robust flavor and color. That said, if all you have is regular cocoa powder, it will still work in this recipe.
Boiling Water: Very hot water serves two purposes here. Firstly, it causes the cocoa powder to bloom for an extra rich chocolatey sauce. It also helps the cocoa powder and sugar to dissolve rapidly so they all trickle down into the bloom of the baking dish to create that lush sauce we're after.
Strawberries: I used frozen strawberries which are great because they are available year round. I've also tested this recipe with fresh berries and they worked very well, too! Raspberries (fresh or frozen) would make a delicious substitute if those are what you have on hand.
Serving & Storage Suggestions
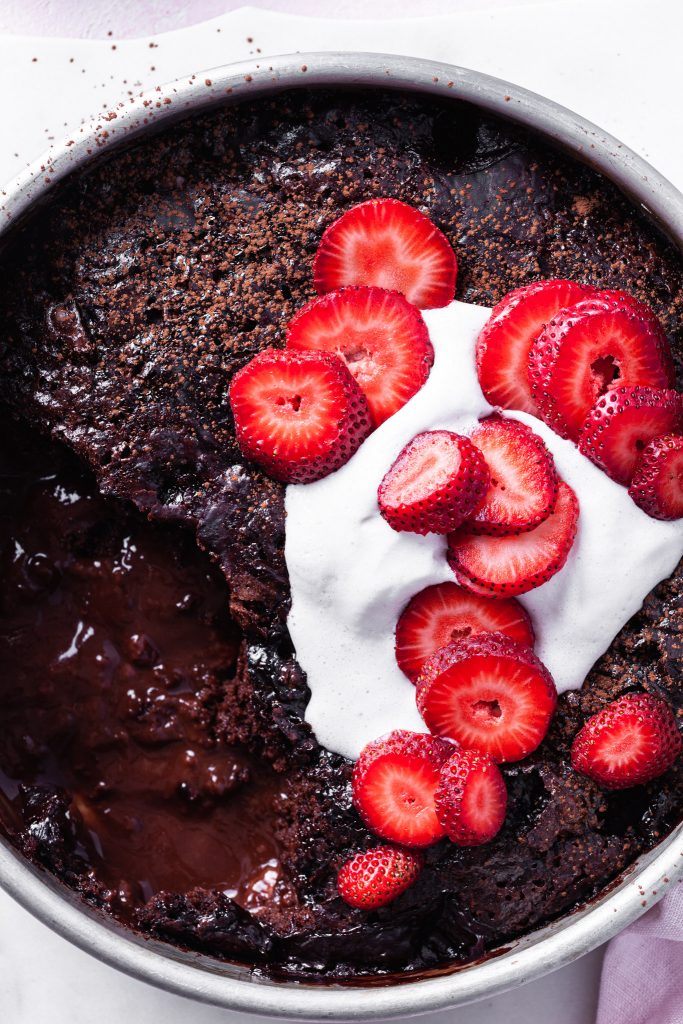
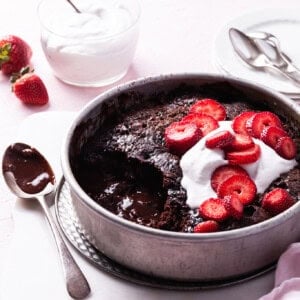
This is not the type of cake to cut into tidy slices. Simply grab a big spoon and scoop the tender cake out into serving bowls. Be sure to ladle out some of that dreamy chocolate strawberry sauce on the bottom, too! Everything about making and baking to serving this dessert is so fuss-free!
This vegan chocolate strawberry cake is perfect on its own, but a scoop of dairy-free ice cream or whipped cream is amazing on top.
The sauce is pretty molten when it comes out of the oven, so it's best to let the whole thing rest for 10-15 minutes. This also gives the sauce a little more time to thicken. It is best served while it's still warm - as it cools, the cake will absorb a lot of the sauce. Leftovers are still delicious, just not as saucy.
Leftovers can be kept covered at room temperature for a day but should be moved to the fridge after that to avoid mold growth. Enjoy it whichever way you prefer - it's delicious cold from the fridge, but if you'd like to revisit that gooey, warm experience, simply reheat a serving in the microwave for about 30-40 seconds. Otherwise, seal it tightly with aluminum foil and reheat it in a heat-safe dish in the oven.

More Easy Vegan Dessert Recipes
- No-Bake Chocolate Biscoff Tart
- Upside Down Caramel Banana Sheet Cake
- Triple Chocolate Banana Bread
- Ultimate Chocolate Chunk Cookies
If you make this Self-Saucing Chocolate Strawberry Pudding, please give it a rating in the recipe card and leave a comment below! Follow along on Instagram where you can tag me in your creations using my recipes! You can also follow me on Pinterest for vegan recipe inspiration and on Facebook. Thank you for reading!
Self-Saucing Chocolate Strawberry Pudding
Recipe Video
Ingredients
- 10 oz frozen strawberries (see notes for substitutions)
- 1 tablespoon cornstarch
- 1 ½ cups all-purpose flour (see notes for gluten-free option)
- ¾ cup granulated sugar
- ⅓ cup unsweetened Dutch processed cocoa powder (may use regular cocoa powder)
- 2 teaspoon baking powder
- ½ teaspoon salt
- ¾ cup plant-based milk (I use soy)
- ⅓ cup avocado oil (or other neutral vegetable oil)
- 2 teaspoon vanilla extract
For the Sauce Layer:
- ¾ cup granulated sugar
- ¼ cup cocoa powder
- 1 cup boiling water
- Whipped coconut cream or vegan ice cream, for serving
Instructions
- Preheat the oven to 350°F (177°C/gas mark 4). Lightly oil an 8-cup (2L) baking dish, 10-inch (25-cm) cast-iron skillet or cake pan.
- Carefully cut any of the larger strawberries in half so the berries are all roughly the same size. Place the strawberries in the baking dish and toss with the cornstarch. Set in fridge while you prepare the cake batter.
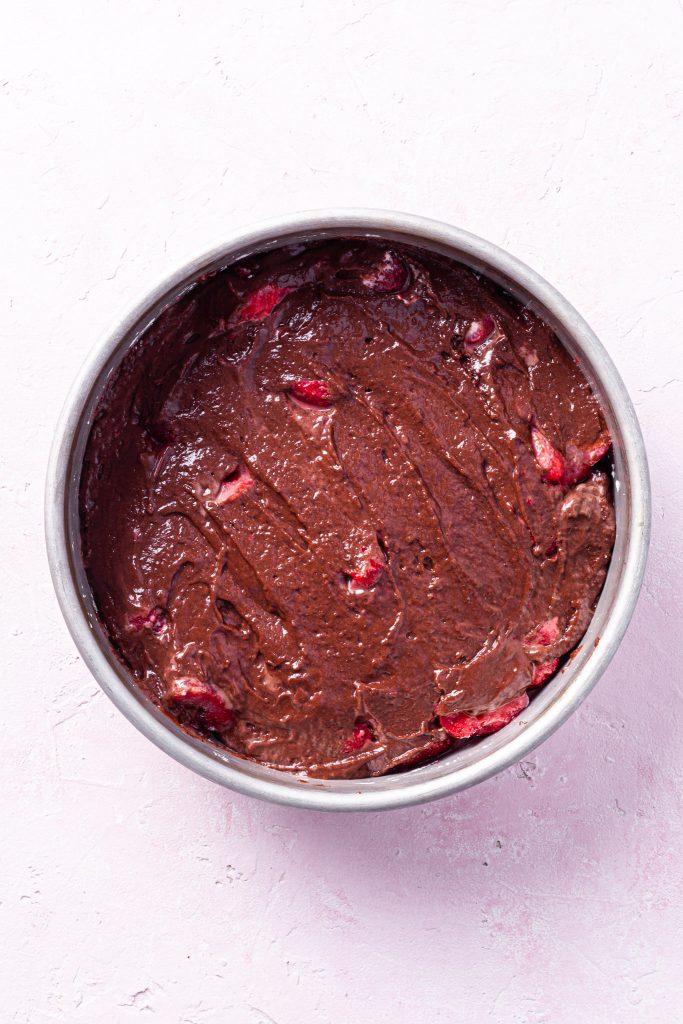
- In a medium bowl, sift the flour, sugar, cocoa powder, baking powder, and salt together. In a small bowl, combine the plant-based milk, oil and vanilla extract. Pour the liquid mixture in with the flour mixture, stirring just until combined. It will be thick. Remove the baking dish from the fridge and gently spread the cake batter evenly over the strawberries.
- In a small bowl, mix together the remaining sugar and cocoa powder for the sauce layer.
- Sprinkle the sugar and cocoa powder mixture evenly over the batter and then slowly pour the boiling water over the top, being careful not to have the water held too high so you don't splash it or create a crater. Do not stir.
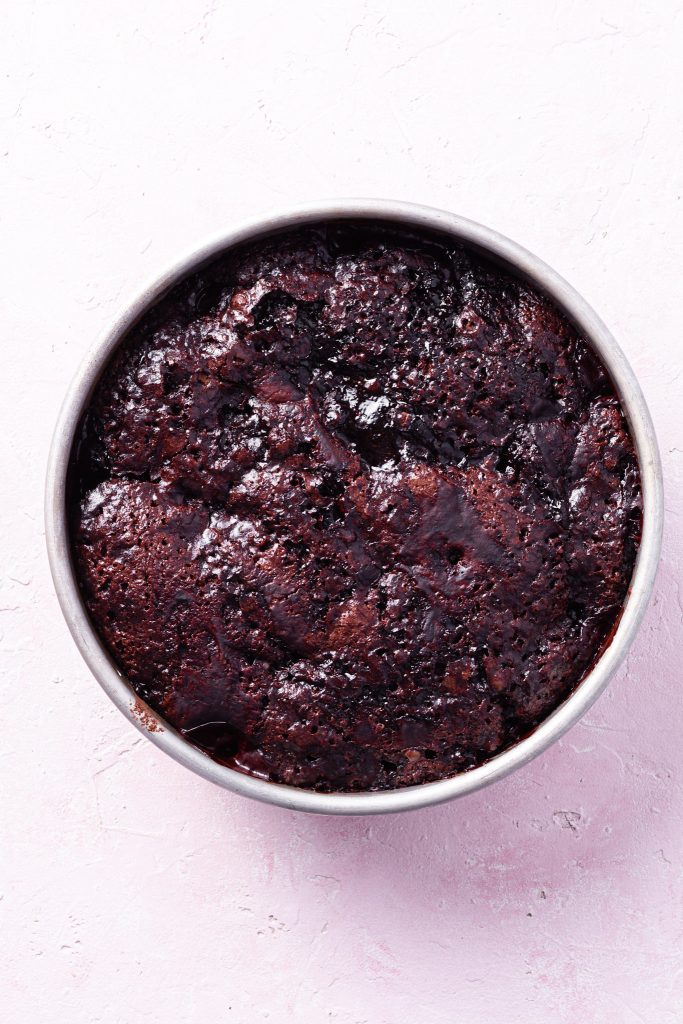
- Place the baking dish on a piece of foil in the preheated oven in case it boils over. Bake for 35 to 40 minutes, or until a toothpick inserted in the middle of the top cake layer comes out clean (if you poke too low, you'll hit sauce). Let it cool for about 10 minutes before serving. Use a large spoon to scoop the pudding cake and sauce into serving bowls. Top with whipped coconut cream or ice cream, if desired. Best served shortly after baking as the cake will absorb the sauce over time. Leftovers can be eaten as is, but are best reheated. Store tightly covered for up a day at room temperature, or 5 days in the refrigerator.
Jen says
Thank you so much, this recipe is gorgeous, I have no need to keep searching for the perfect SS Pudd recipe anymore!
Bronwyn Fraser | Crumbs & Caramel says
I'm so happy you enjoy the pudding, Jen! Thank you for sharing! ~ Bronwyn
Sarah R says
OMG i am in heaven! This is so delicious! It tastes indulgent and chocolaty. I think this has made its way to the top of my favorites list. Thank you for sharing this!
Crumbs & Caramel says
Hi Sarah! You're welcome! Thank YOU for the awesome review - I'm so happy you enjoyed this dessert! 🙂 ~ Bronwyn