
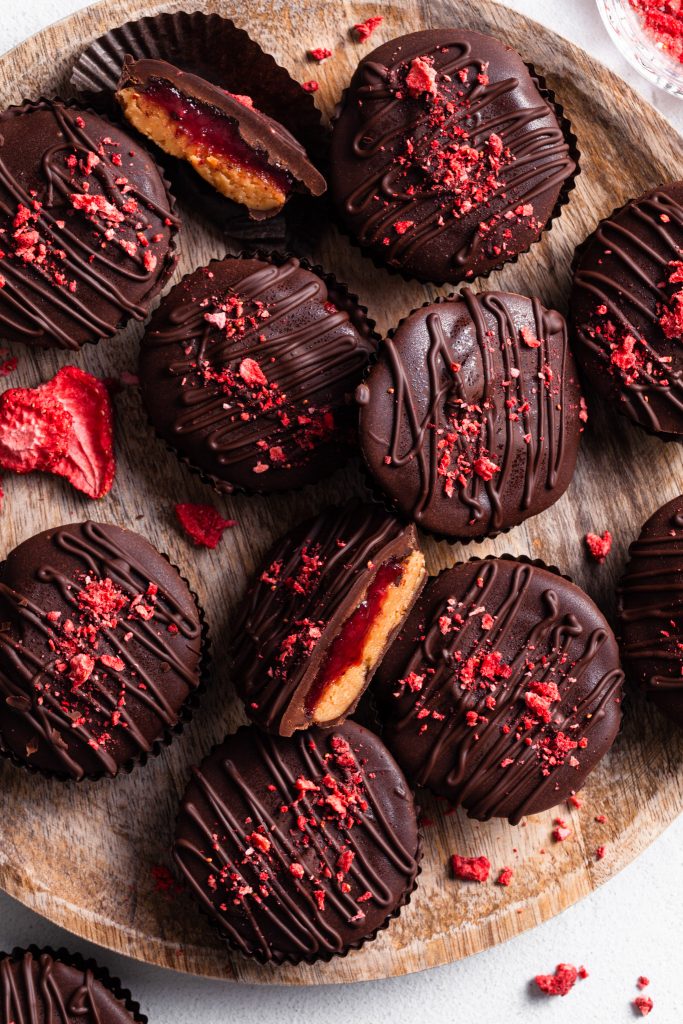
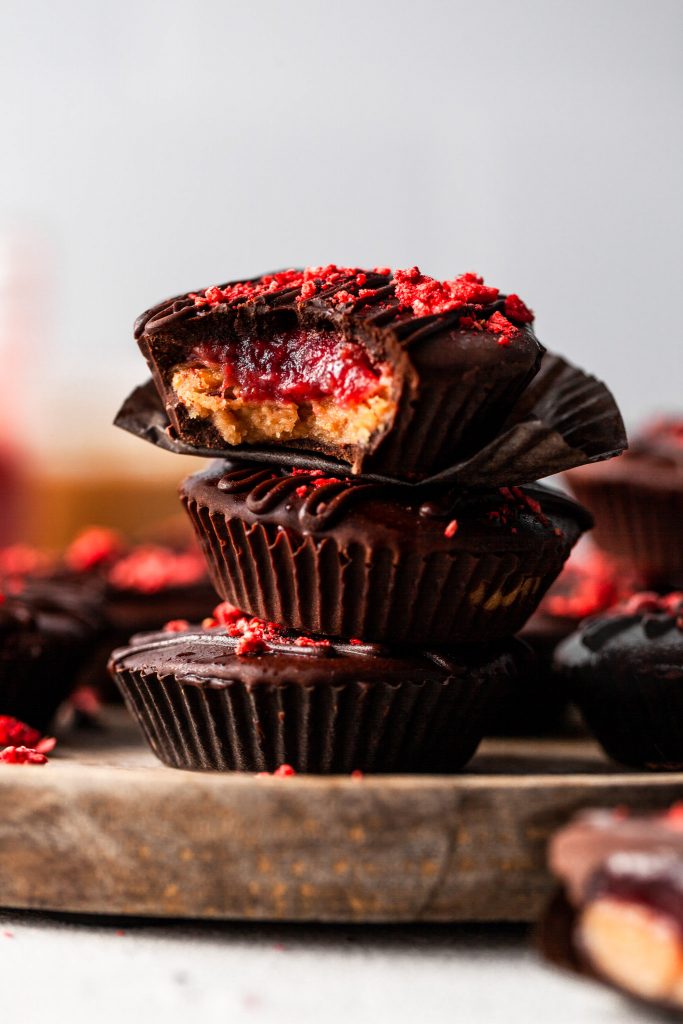
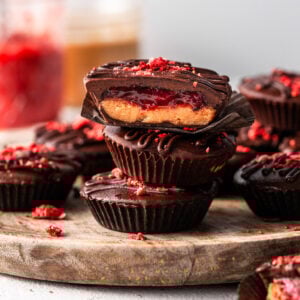
Inspired by the classic PB&J sandwich, this no-bake treat features strawberry jam and a decadent peanut butter filling tucked into satiny chocolate cups for kids of all ages! These vegan peanut butter and jam chocolate cups are easy to customize using the pantry staples you love the most and have on hand.
Thank you to Stahlbush Island Farms for sponsoring this post. As always, all opinions are my own.
These vegan peanut butter cups (with a sneaky layer of strawberry preserves!) are perfect anytime, whether for a fun after school snack, homemade Halloween candy, or a quick dessert! If you love sweet and salty snacks, these homemade chocolates are for you!
How to Make Peanut Butter & Jam Chocolate Cups
These peanut butter and jam cups come together easily in just a few steps:
- make the quick 5-minute jam (or use pre-made jam or jelly if you're in a rush!)
- melt the chocolate and spread it to coat the liners, then set them in the freezer
- while the chocolate chills, mix the one-bowl peanut butter filling
- layer the jam over the peanut butter filling in each chocolate cup
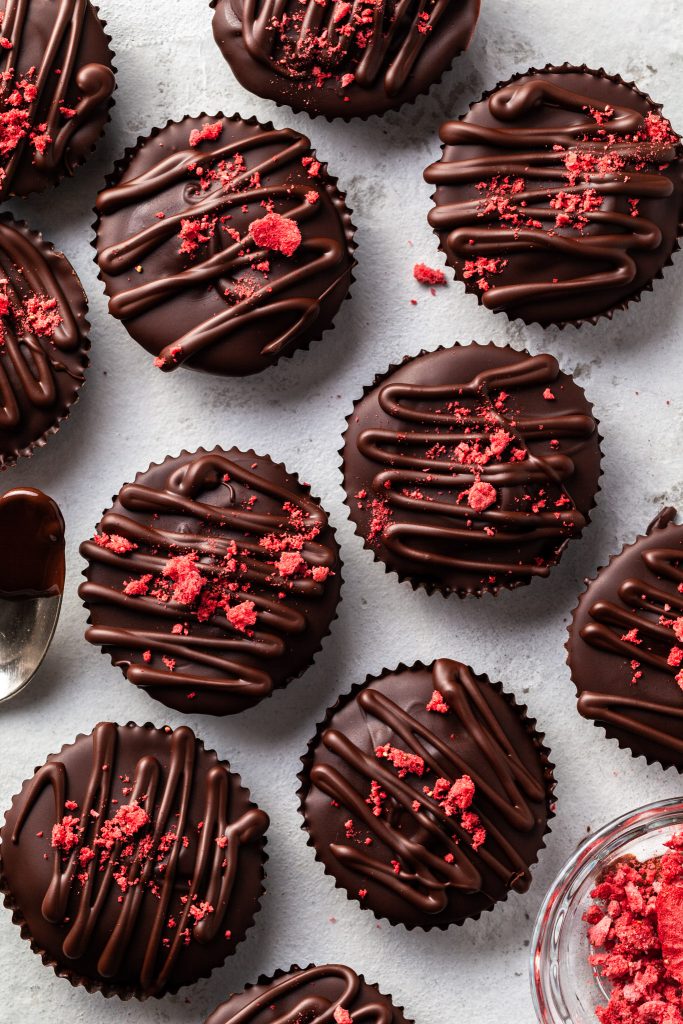
- top with melted chocolate and sprinkle with crushed freeze dried strawberries (if desired!) and chill to set. Enjoy!

Feature Ingredients and Substitutions
Strawberries:
I used Stahlbush Island Farms' frozen strawberries which are perfectly ripened before harvest. Mix things up by using other types of frozen berries such as raspberries, blackberries, blueberries, or a summer berry blend!
If you don't have any frozen berries, you can use fresh berries with the same result. And if you don't have any berries at all or are short on time, use your favorite ready-made jam or jelly!
Good Quality Chocolate:
The best type of dairy-free chocolate to use for these vegan chocolate PB&J cups is the one you love to eat on its own! I've tested these chocolate cups with semi-sweet chocolate and dark chocolate with excellent results.
A good quality chocolate melts effortlessly and is easier to work with. Chocolate chips vary a lot in quality as they often contain ingredients that help them keep their shape during baking - while this helps them look good on top of a cookie fresh out of the oven, they are harder to melt and spread in the cups. Lesser quality chocolate like this also tends to taste a bit waxy and aren't great for snacking on. When in doubt, a chopped good quality chocolate with very few ingredients is your best bet!
Coconut oil:
Added to the chocolate during melting, coconut oil will help the chocolate not be so brittle or hard once set up, making it easier to bite into especially if you're using a dark chocolate. The chocolate won't taste of coconut with the amount used. However, if you are really sensitive to the flavor of coconut and dislike it, you can used refined or deodorized coconut oil which has no flavor (or even shortening). I don't recommend using vegan butter because it often contains water which can cause the chocolate to seize or clump.
Peanut Butter:
I use natural peanut butter in this recipe because it has a more robust peanut flavor than processed peanut butter. It also firms up once a bit of liquid (in this case, vanilla extract) is added. When the peanut butter filling begins to thicken, it becomes easy to scoop, roll into balls, flatten, and add to each chocolate cup. Natural peanut butter also (contrary to intuition) produces more of a Reese's copycat flavor!
If you prefer to use processed peanut butter, these chocolate treats will still be delicious although you may choose to reduce or omit the sugar, vegan butter, and salt. Most processed peanut butters are already sweetened, salted, and contain added oil of some kind. So if you make modifications, taste as you go. If the filling tastes good before it goes into the cups, it will definitely taste good once paired with the jam and chocolate!
Either smooth or crunchy peanut butter works in these chocolate treats - use whichever you enjoy the most.
And while these are dairy-free peanut butter cups, feel free to play with other types of nut or seed butters! Almond, cashew, or tahini are all great choices. The consistency of the filling will naturally be different depending on the one you use, some being runnier than others.
Vanilla:
As mentioned, the vanilla extract will help the natural peanut butter to seize and thicken, making the filling easy to shape. Even if you're using processed peanut butter which is less likely to thicken, vanilla is still a great addition because of how it enhances the flavor of the filling.
Vegan Butter:
When using natural peanut butter, the vegan butter adds additional creaminess and richness to the filling so it's not just peanut butter, but rather something a little more special and rich.
Tempered Versus Untempered Chocolate
Any confectioner worth their weight in candy will tell you that when making chocolate treats, the chocolate should be tempered first. But most of the time when making family treats, I skip the tempering because it's not critical to a yummy chocolate dessert.
Tempered chocolate sets faster, has a smoother texture, and has a uniform, glossy finish. Untempered chocolate is softer once set, has a duller finish, and does not keep as long before it starts to bloom. Blooming happens when the cacao butter begins to separate out, appearing like white blotches or streaks (which is safe to eat, it just isn't as pretty.) All that said, I don't call for tempering the chocolate in this peanut butter cup recipe because we're going for a quick candy recipe that the kids can help make. And! This kind of peanut butter and jam dessert doesn't stick around long enough to lose its pretty sheen. If you're interested in making these chocolate cups for an edible gift, and would like to try tempering the chocolate so it looks and keeps its best, check out this well written article on how to temper chocolate.
Chocolate Sticking to Liners?
If using inflexible cups like those in aluminum muffin baking trays, line them with paper or silicone cupcake (or candy cup) liners so you'll be able to easily remove the chocolate cups later. Whether you're using paper or silicone molds, there's no need to grease them before adding the melted chocolate. If, however, you find it difficult to remove the liners from the chocolate, this could happen for a few reasons:
- the chocolate is too warm - simply pop it into the freezer for 10 minutes to firm up. This is more common with untempered chocolate, which we're using for this easy chocolate candy recipe.
- the cups are overfilled and the chocolate has gone over the edges of the cups and set. As a result, the chocolate is embedding some liner so it can't be easily peeled away.
- lower quality paper liners filled with untempered chocolate can result in the chocolate sticking the to liners. Look for higher quality cupcake liners, non-stick cupcake liners, or glassine liners like these peanut butter cup liners.
- if you're using silicone liners, make sure they are clean and dry before use.
Storage Suggestions
Keep these vegan chocolate treats in a sealed container in the refrigerator (up to about a week) or freezer (for a few months) for nice shiny tops and the best texture. While it's safe to leave them at room temperature, the untempered chocolate will start to bloom within a day or two. Bloomed chocolate is fine to eat, it's just not as pretty. Untempered chocolate also melts much more easily so if your home is warm, it's a safer bet to store the chocolates cups in the refrigerator.
If storing these PB&J cups in the freezer, allow them to defrost for 15 minutes before enjoying so they aren't too hard.

More Easy Vegan Chocolate Recipes:
- Chocolate Candy Bark
- Self-Saucing Chocolate Strawberry Pudding
- Ultimate Chocolate Chunk Cookies
- Rocky Road Dessert Pizza
If you make these vegan Peanut Butter & Jam Chocolate Cups, please give them a rating in the recipe card and leave a comment below! Follow along on Instagram where you can tag me in your creations using my recipes! You can also follow me on Pinterest for vegan recipe inspiration and on Facebook. Thank you for reading!
Peanut Butter & Jam Chocolate Cups
Recipe Video
Ingredients
Jam Filling: (see Notes below if using store-bought jam or jelly)
- 2 ¼ cups frozen strawberries, chopped (see Notes below for substitutions)
- 3 tablespoon granulated sugar
- 1 tablespoon lemon juice
- 2 tablespoon cornstarch
- 2 tablespoon cold water
Chocolate Cups:
- 16 oz vegan semi-sweet or dark chocolate, chopped (or good quality vegan chocolate chips)
- 2 tablespoon coconut oil
Peanut Butter Filling:
- ⅔ cup natural peanut butter, stirred before measuring (see Notes below for substitutions)
- 2 tablespoon vegan butter, softened
- ⅓ cup sifted confectioners' sugar
- 1 teaspoon vanilla extract
- ¼ teaspoon salt
Garnish, Optional:
- 2 tablespoon crushed freeze-dried strawberries
Instructions
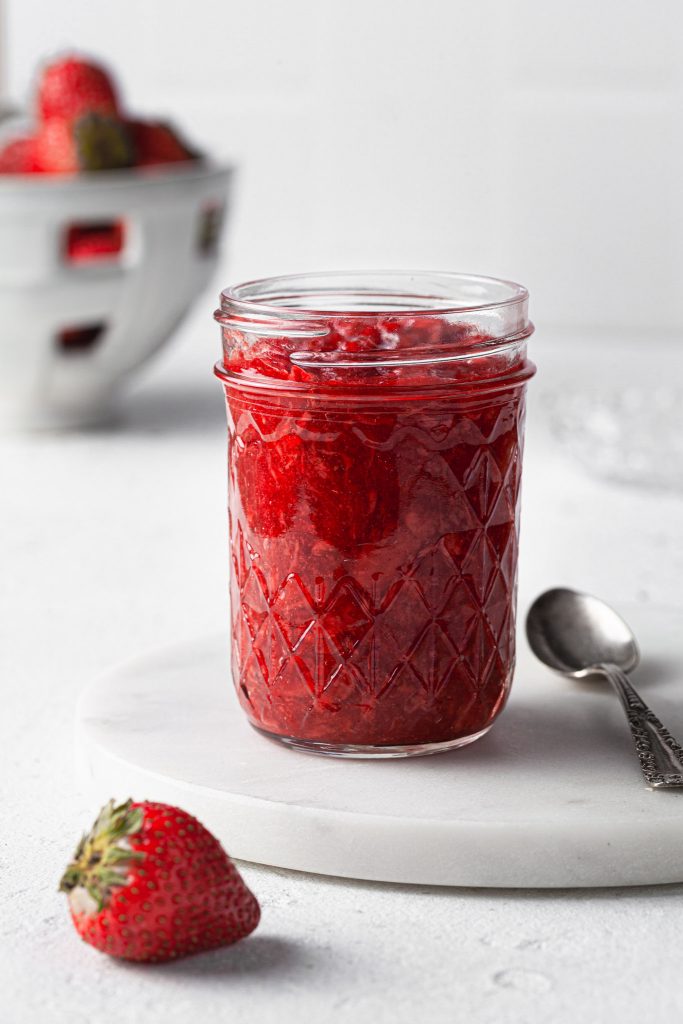
Jam Filling:
- In a small pot over medium-low heat, stir the strawberries until the they begin to release their juices. If they are sticking, reduce the heat.
- Stir in the sugar and lemon juice. Simmer and stir the berries for 1-2 minutes to cook the berries through.
- Meanwhile, whisk the cornstarch and cold water together in a small bowl until no lumps remain. Pour the cornstarch slurry into the berry mixture, stirring constantly so you don't end up with lumps of cooked cornstarch - the mixture will thicken quickly. Reduce the heat a little, stirring over a lower simmer for another minute.
- Remove the jam from the heat, and pour into a heat safe jar. Set aside to bring to room temperature before covering and placing in the refrigerator until you're ready to fill the chocolate cups.
Chocolate Cups:
- In a medium-sized bowl, melt the chocolate and coconut oil together, stirring until completely smooth and the coconut oil is incorporated. You can do this in the microwave: do so in 30-40 second bursts at 50% power, stirring in between. Chocolate burns very easily rendering it unusable for recipes like this, so slow and steady is best. Otherwise, use a double-boiler, taking care not to get any water in the chocolate.
- Line a standard 12-cavity muffin tin with cupcake liners or peanut butter cup liners. Fill each with 1 ½ teaspoons (8 mL) of melted chocolate, spreading it up the sides with the back of a spoon. If using standard cupcake liners, spread the chocolate halfway up each liner, and if using peanut butter cup liners, spread the chocolate all the way to the top of the liners. Chill in the freezer for a few minutes or until the chocolate has hardened - this will prevent the fillings from sinking.
Peanut Butter Filling:
- In a medium-sized bowl, stir the natural peanut butter (see Notes below if using processed peanut butter) and vegan butter together. Add in the sifted confectioners' sugar, vanilla, and salt. Stir until well incorporated and the mixture starts to thicken (the liquid from the vanilla will help seize/thicken natural peanut butter.)
- Scoop a heaping teaspoon (18-20 g) of the peanut butter filling, roll into a ball, and then flatten so you have a little puck. Continue with the rest of the peanut butter filling - you should have 12 of them.
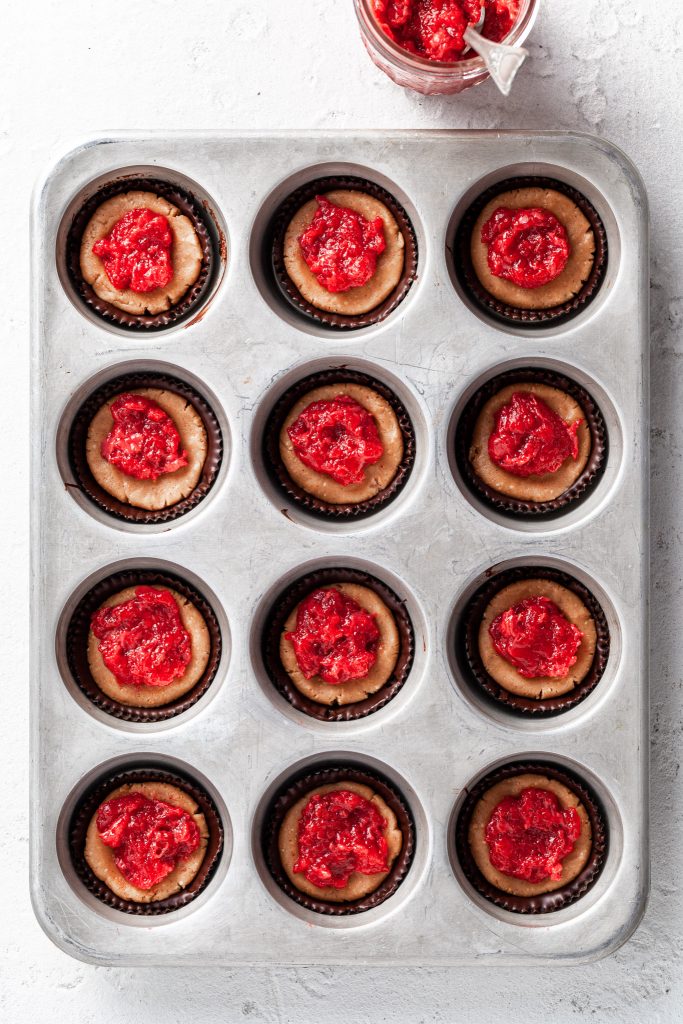
To Assemble the PB&J Chocolate Cups:
- Remove the hardened chocolate cups from the freezer and place a peanut butter puck into each cup. Top the peanut butter with a 1½ teaspoons (8 mL) of jam.
- Reheat the chocolate if necessary, and spoon about a tablespoon (15 mL) evenly over the top of each cup, smoothing the chocolate with the back of the spoon to seal the edges. If garnishing, sprinkle the crushed freeze-dried strawberries over the top. Give the muffin tin a gentle tap on the counter to release any bubbles then place in the freezer to set.
- Serve chilled or brought to room temperature. Store in an airtight container for about a week in the refrigerator and up to a few months in the freezer.
Nutrition Info:
Notes:
The Nutrition Information is only an estimate. The accuracy of the Nutrition Information for any recipe on this site cannot be guaranteed.
Post may contain affiliate links which means if you click on the link and make a purchase, I may make a very small percentage in commission on qualifying purchases. There's never any extra cost to you, and I only link to products I actually use and enjoy. Thank you for your support!

Leave a Reply